
Working with canvas in silverlight
Canvas in Silverlight
The Canvas Panel
The Canvas panel is a basic layout control that allows you to position Silverlight elements using explicit
Co-ordinates relative to the canvas location.
Elements inside a Canvas are positioned using a XAML feature called "Attached Properties" - which allow you to specify a control's position relative to its immediate parent Canvas control's Left, Top, Right or Bottom coordinates.
Demo:
Let’s build a quick example on using the Canvas panel.
1. Open Visual Studio 2010 and create a new Silverlight application called Canvas.
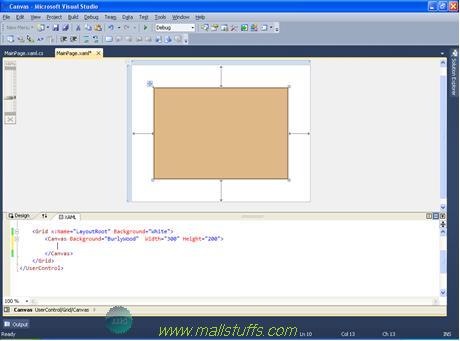
2. In MainPage.xaml file, within the main Grid element, add a Canvas element. Assign it a Width property of 300 and a Height property of 200.To view the Canvas panel separately in the
Application set the background color to BurlyWood. The following XAML adds this Canvas:
<Grid x:Name="LayoutRoot" Background="White">
<Canvas Background="BurlyWood" Width="300" Height="200">
</Canvas>
</Grid>
At this point, You will see a very simple rectangle with background color as ‘BurlyWood’.
Let’s add a Label and textbox to this Canvas panel. Note that texblock in Silverlight is same as label in asp.net
<Grid x:Name="LayoutRoot" Background="White">
<Canvas Background="BurlyWood" Width="300" Height="200">
<TextBlock Width="100" Canvas.Top="20" Height="30" Text="Label 1" />
<Button Width="100" Height="30" Content="Button 2" Canvas.Top="20" Canvas.Left="80" />
</Canvas>
</Grid>
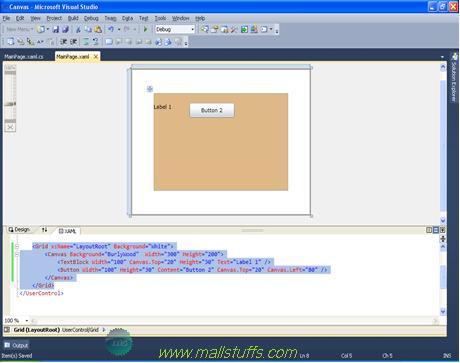
As you can see, both textblock and button control’s position is controlled by top and left property of the parent canvas.
Based on the above concepts, lets add more control to our parent canvas control
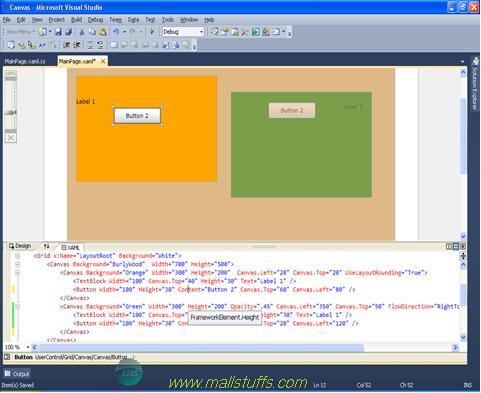
As you can see above, we have added two child canvases inside parent canvas. Each of this child canvas position is determined by left and right property of parent canvas control. Also, we have controls inside the child canvas whose positions are determined by the child canvas control and not by the parent child canvas. I.e. Text block and button control have taken their position on the basis of their immediate parent canvas control.
Also, for the second child canvas control, we have set the flow direction from right to left. The effect is, textblock and button positions are determined from the right border of the canvas rather than the left border of the canvas. I.e. Canvas. Left is actually working like canvas. Right.
Also we have the option to set opacity to define the transparency of your canvas.
Some Tips and Tricks with Canvas
Formatting a Canvas
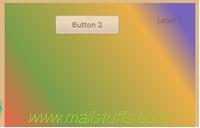
The Background property of the Canvas sets the background colors of a Canvas. You may use any brush to fill the border. For this example, we use a linear gradient brush to draw the background of a Canvas.
<Canvas.Background>
<LinearGradientBrush StartPoint="0,0" EndPoint="1,1" >
<GradientStop Color="Blue" Offset="0.1" />
<GradientStop Color="Orange" Offset="0.25" />
<GradientStop Color="Green" Offset="0.75" />
<GradientStop Color="Red" Offset="1.0" />
</LinearGradientBrush>
</Canvas.Background>
LinearGradientBrush StartPoint co-ordinate is 0,0 and endpoint is 1,1. So, the brush will start rendering diagonally from topleft to rightbottom. If the canvas flowdirection is from right to left, then the brush will start rendering diagonally from topright to leftbottom
Setting Image as Background of a Canvas
We can set an image as the Background of the Canvas.
<Canvas.Background>
<ImageBrush ImageSource="Flowers.jpg" />
</Canvas.Background>
For this to work, make sure that your image build action is set to resource. (goto image properties in your Silverlight application and set build action to resource)
Filling the Entire Browser Window with Your Application
By default, in a new Silverlight project, the root UserControl object is set to a width of 400 and a height of 300. In some cases, you may wish your Silverlight application to take up the entire window of your browser, and to resize as the browser is resized. This is done very easily within Silverlight. When you wish for the width and height to be set to 100%, simply omit the element’s Height and Width attributes.
As an example, the following source has been adjusted for the Canvas panel and the Silverlight
application to take up the entire browser:
<UserControl x:Class="Canvas.MainPage"
xmlns="https://schemas.microsoft.com/winfx/2006/xaml/presentation"
xmlns:x="https://schemas.microsoft.com/winfx/2006/xaml"
xmlns:d="https://schemas.microsoft.com/expression/blend/2008"
xmlns: