Appending Html elements or contents dynamically
In this article, we will see how we can append, prepend, insert or move HTML elements or HTML contents to any existing HTML element at runtime without refreshing the browser using jquery
Inserting Content inside Elements
Suppose you want to add content at the end of an existing content. You can get this functionality using the html () functions also but it will be a long way around as shown in the steps below:
1. Grab the current content of the element.
2. Save this content to a variable.
3. Use JavaScript concatenation to combine this content with the new Content.
4. Use the html () function to put the new combined content back into the Original element.
However, JQuery developers have provide us a function to combine all these four steps into a single
Step as follows:
Appending content
To append or add content after existing content inside an element, do the following:
1. Create a Web page containing the following code:
<html>
<head>
<title>My Test Page</title>
<script type="text/javascript" src="jquery-1.6.4.min.js"></script>
<script type="text/javascript">
$(document).ready(function() {
$(':submit').click(function () {
$('div').append('Sarin');
$('div').prepend('<strong>Hi</strong>, ');
});
});
</script>
</head>
<body>
<div>My name is </div>
<br />
<input value="Go" type="submit"/>
</body>
</html>
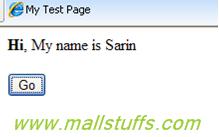
The code says that “When the button is clicked, append the div content with the content provided in the JavaScript function.”
2. Save this file, and then view it in your browser. Click the button.
The content is appended, as shown below

Prepending content
3. Similarly, prepend the content of the div with the content specified in the prepend function. The prepend function allows you to place content in front of a selected element.
Add the javascript function as shown below.
$('div').prepend('<strong>Hi</strong>, ');
The code says, “When the button is clicked, prepend the content to the Content of any <div> element,
4. Save this file, and then view it in your browser. Click the button.
The content has now been prepended and appended, as shown below

Inserting Content outside an Element
In addition to appending and prepending content inside elements, JQuery has functions to allow you to put content in front of an element or after an element. Difference between this functions are that Prepending and appending functions place content inside Selected elements whereas The before() and after() functions place content outside the selected elements.
To insert content before or after an element, do the following:
5. Add the before and after function as follows:
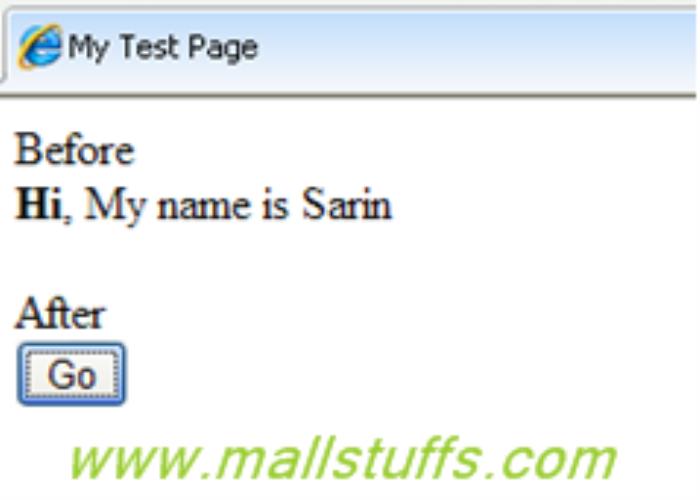
$('div').before('Before<br />');
$('div').after('<br />After');
Naming conventions used by JQuery developers itself suggest that the before () function would place content
Before the <div> element and the after() function would place content after the <div> element.
6. Save this file, and then view it in your browser. Click the button.
The content has been placed before and after the <div> element, as

Moving Elements Around
You can also move elements before or after other elements using the insertBefore() and insertAfter() function. For example, suppose your page has an image followed by the <div> element, but after clicking a button, you want the image to be shown after the <div> element. This can be done as follows:
7. Add the following input element and JavaScript code as shown below
<input value="Set Image" type="button" />
$(':button').click(function () {
$('div').insertBefore('img');
});
The insertBefore() function places the <div> element before the <img> element.The code is case sensitive. You must use the camel case capitalization with these two functions (insertBefore() and insertAfter()); otherwise the code will not work.

8. Save this file, and then view it in your browser and click the set image button
The <div> element is placed before the <img> element, as shown in

We could have used the insertAfter() function in the preceding example like so:
$(':button').click(function () {
$('img').insertAfter('div');
});
This code says to put the <img> element after the <div> element.
Inserting New Elements
9. JQuery has two methods for inserting elements before other elements: .insertBefore() and .before(). These two methods have the same function; their difference lies only in how they are use with other element. Another two methods, .insertAfter() and .after(), have the same relationship with each other, but as their names suggest, they insert elements after other elements. For the Back to top links we'll use the .insertAfter() method:
$('<a href="#top">Go to top</a>').insertAfter('div');
The .after() method will do the same thing as .insertAfter(), but with the selector expression preceding the method rather than following it.
$('div').after ('<a href="#top">Go to top</a>');
So, in this demo, we have seen how to append, insert, remove, move contents of elements or between two elements.

Note: Images used on this website
are either a production of Bhaktivedanta Book Trust(https://www.krishna.com), Iskcon
Foundation or were found in google search under "Free to use and share". If any
of the images presented here violates copyright issues or infringes anyone copyright
or are not under "Fair use", then please bring it to our notice. Read
Disclaimer for more.
Share this to your friends. One of your friend is
waiting for your share.
Related Articles
Working with Stack Panel in silverlight
Select Groups of similar elements using position selector
Show always visible content on a webpage
Cloning HTML Elements using jquery
Demo of Jquery functions and events for dropdownlist
Appending Html elements or contents dynamically
Working with server controls and HMTL controls
Working with Dockpanel in silverlight
Post Comment