
Tips and tricks with ajax calendar extender control
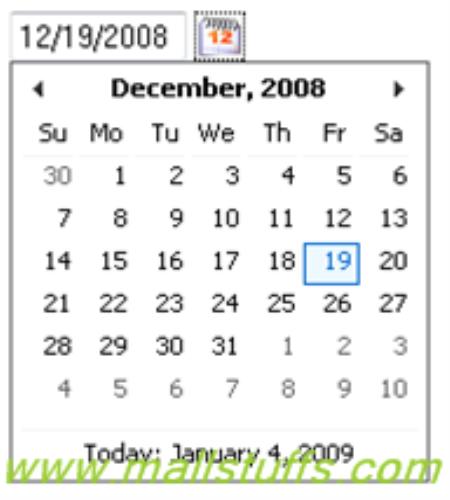
CalenderExtender extender control pops up a calendar whenever the user clicks on the target control, or a popup control. The extender is commonly used to popup a calendar for a Textbox, like in an airline reservation system when selecting the form and to dates. CalendarExtender control is very cool as you can associate the CalendarExtender to a TextBox and also to a Button/ImageButton so that you can popup the calendar.
Below is the code to get started with CalendarExtender:
<asp:TextBox
ID="TextBox1"
runat="server"
width="300pt" />
<asp:ImageButton
ID="btnCalenderPopup"
Width="16" Height="16"
runat="server"
ImageUrl="~/images/calender.bmp"
CausesValidation="False" />
<ajaxToolkit:CalendarExtender
ID="CalendarExtender1"
runat="server"
TargetControlID="TextBox1"
PopupButtonID="btnCalenderPopup"
Format="dd/MM/yyyy" />
The calendar extender can work by targeting a Textbox control directly, like so:
Calendar Properties:
TargetControlID - The ID of the TextBox to extend with the calendar.
CssClass - Name of the CSS class used to style the calendar
Format - Format string used to display the selected date.
PopupButtonID - The ID of a control to show the calendar popup when clicked. If this value is not set, the calendar will pop up when the textbox receives focus.
PopupPosition - Indicates where the calendar popup should appear.
SelectedDate - Indicates the date the Calendar extender is initialized with.
In this mode, the calendar extender appears when the textbox is clicked on. Clicking out of the <https://wiki.asp.net/page.aspx/318/textbox/> textbox hides it. (Note: In case you are clicking on the textbox to open the calendar, then in earlier versions of the toolkit, the calendar would not hide automatically when the user clicked anywhere outside the Calendar control. However this was fixed in the later versions. In fact, in the latest version, the Calendar hides automatically when a date is selected.
If for some reason you are facing issues with the Calendar not hiding automatically, make sure that you have the latest version of the AJAX Control Toolkit. )
The extender also can take a PopupButtonID reference to a button that can be clicked. When the button is clicked, it shows the calendar; clicking on the button again hides it.
The calendar extender can switch to year/decade view by clicking on the header. Clicking the first time brings up a list of months; clicking again brings up a list of years. The left and right arrow buttons also page through the months or years.
The Calendar Extender also supports localization, and you can localize it by setting the EnableScriptGlobalization Script Manager property to true, this way the calendar extender will display its contents based on the current page culture.
ASP.NET AjaxToolkit Calendar extender is most commonly used control of AjaxControlToolkit. However developers often not use it, because of not able to implement some additional business requirements. Usually asp.net developers replace it with standard asp.net calendar control within UpdatePanel. It might fulfill their requirement but it’s very slow solution. Using Ajax controls as it is not difficult but extending it requires a lot of effort. So in this article we will see how to extend default functionality of AjaxControlToolkit Calendar Control Extender, to fits our needs, without touching AjaxControlToolkit source code.
Let's build simple sample of Calendar extender:
<asp:ScriptManager ID="ScriptManager1" runat="server">
</asp:ScriptManager>
<table>
<tr>
<td>
<asp:TextBox ID="txtDate" runat="server" Width="70"></asp:TextBox>
<ajaxToolkit:CalendarExtender ID="ceCalendar" runat="server"
PopupButtonID="ibtnCalendar"
TargetControlID="txtDate">
</ajaxToolkit:CalendarExtender>
</td>
<td>
<asp:ImageButton ID="ibtnCalendar" ImageUrl="~/images/CalendarIcon.jpg" Width="20px" runat="server" />
</td>
</tr>
</table>
Close Button
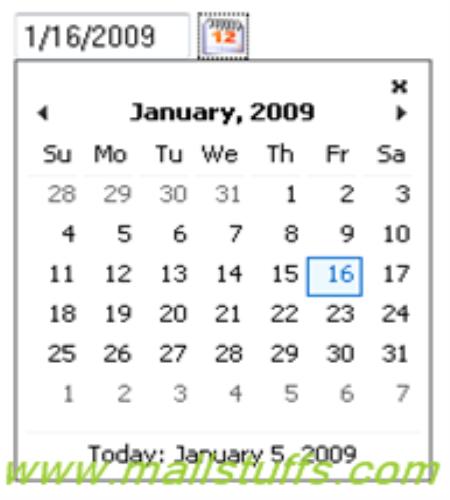
First of all they always want a close button. By default, AjaxControlToolkit Calendar doesn't have a close button. What if your client, doesn't want to pick a date, and would like to close calendar. Clicking outside of calendar control may fulfill your requirement but for business guys this is not satisfactory. Calendar need to have close button, like a normal window.
To solve this problem we need to use JQuery for inserting little cross in right top corner of calendar. If you inspect ajaxtoolkit calendar with firebug you will see that it consits of div#ceCalendar_container and inside two divs: div#ceCalendar_header and div#ceCalendar_body. So, we need to inject our little cross before those two divs. After we add div with little x, we need to bind handler which will close it onclick.
<script type="text/javascript">
function GenerateCloseButton(sender, e)
{
if ($('#ajax__calendar_close_button').length == 0)
{
$(sender._header).before("<div id='ajax__calendar_close_button'>x</div>");
$('#ajax__calendar_close_button').bind("click", sender, function(e) {
e.data.hide();
});
}
}
</script>
My close button is just a little x, however you can insert any image of our own as background of div. below is some basic css style for close button.
<style type="text/css">
#ajax__calendar_close_button
{
margin-right:5px;
margin-left:auto;
width:10px;
font-weight:bold;
cursor:pointer;
text-align:right;
}
</style>
Last step, you need to bind GenerateCloseButton function to some event in AjaxControlToolkit Calendar. OnClientShown is the best event for this purpose:
<ajaxToolkit:CalendarExtender ID="ceCalendar" runat="server"
PopupButtonID="ibtnCalendar"
TargetControlID="txtDate"
OnClientShown="GenerateCloseButton">
</ajaxToolkit:CalendarExtender>
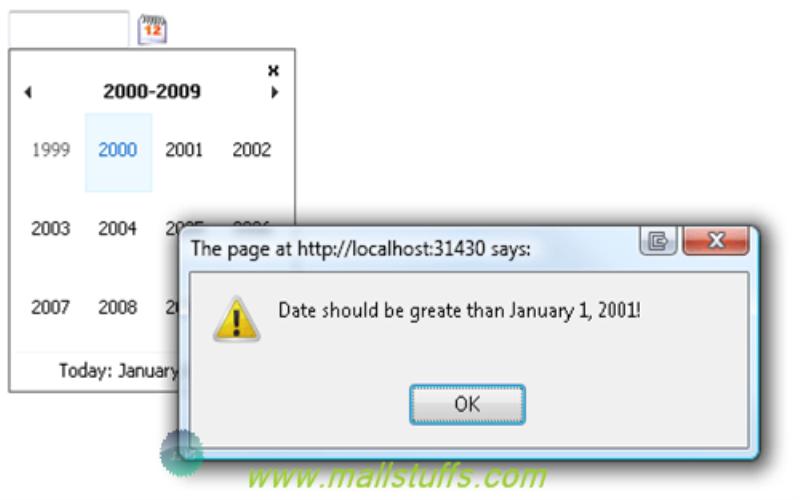
Date restrictions
Second most needed requirement is date restriction
The simplest solution is to check date on OnClientDateSelectionChanged event. However at this point, you can't stop calendar from changing selected date and hiding itself. You can try to do some hacks like clear selected date and show calendar again, but this doesn’t seems to be the right approach since it should not allow me to select date at all. Let's take a look at Ajaxtoolkit Calendar source code. Let's open CalendarBehavior.js. It's easy to see that we need to intercept _cell_onclick event. Let's write our own _cell_onclick (we also need to overwrite _button_onblur, so calendar won't hide, when you click ok in alert window).
AjaxControlToolkit.CalendarBehavior.prototype._button_onblur_original = AjaxControlToolkit.CalendarBehavior.prototype._button_onblur;
AjaxControlToolkit.CalendarBehavior.prototype._button_onblur = function(e)
{
if (!this._selectedDateChanging)
{
this._button_onblur_original(e);
}
}
AjaxControlToolkit.CalendarBehavior.prototype._cell_onclick_original = AjaxControlToolkit.CalendarBehavior.prototype._cell_onclick;
AjaxControlToolkit.CalendarBehavior.prototype._cell_onclick = function(e)
{
var target = e.target;
var today_date = new Date();
if (target.date.getFullYear() < 2001)
{
this._selectedDateChanging = true;
alert('Date should be greate than January 1, 2001!');
this._selectedDateChanging = false;
return;
}
if (target.date > today_date)
{
this._selectedDateChanging = true;
alert('You can\'t choose date in future.');
this._selectedDateChanging = false;
return;
}
this._cell_onclick_original(e);
}
Using RangeValidator:
Since we use a TextBox control to display our date (either by choosing it from the calendar or by manually inputting the date), RangeValidators can be used to check whether the date is within a given range (minimum & maximum). Below is the code for RangeValidator :
<asp:RangeValidator
ID="RangeValidator1"
runat="server"
ControlToValidate="TextBox1"
ErrorMessage="*Please enter proper date"
Type="Date" Display="Dynamic" />
And in your page load event we can set our maximum and minimum date values:
RangeValidator1.MinimumValue = new DateTime(1600, 01, 01).ToString("dd/MM/yyyy");
RangeValidator1.MaximumValue = DateTime.Now.ToString("dd/MM/yyyy");
With these two methods you can easily validate the date. RangeValidators would immediately come to the focus if a wrong date is chosen from the calendar.
Tip 1: How to display and hide a Calendar on the click of a Button
If you want to popup a Calendar on the click of a button, you can use set the PopupButtonID of the CalendarExtender to the ID of the button. In this case, we will be using an ImageButton as shown below:
<asp:ImageButton runat="Server" ID="ImageButton1" ImageUrl="~/Images/Icon1.jpg" AlternateText="Click here to display calendar" />
<asp:TextBox ID="TextBox1" runat="server"></asp:TextBox>
<cc1:CalendarExtender ID="CalendarExtender1" runat="server"
TargetControlID="TextBox1" PopupButtonID="ImageButton1"/>
If you are using an earlier version of the toolkit, you may observe that the ImageButton causes a postback when you click on it again, to close the Calendar. To avoid the postback, use a HTML Image Control instead of the Server side Image Control as shown below:
<img alt="Icon" src="/Images/Icon1.jpg" id="Image1" />
<asp:TextBox ID="TextBox1" runat="server"></asp:TextBox>
<cc1:CalendarExtender ID="CalendarExtender1" runat="server"
TargetControlID="TextBox1" PopupButtonID="Image1"/>
Tip 2: How to Add a CalendarExtender to a GridView
If you want to add a CalendarExtender to a GridView, use a template field with a TextBox and CalendarExtender as shown below:
<form id="form1" runat="server">
<asp:ScriptManager ID="ScriptManager1" runat="server" />
<div>
<asp:GridView ID="GridView1" runat="server" AutoGenerateColumns="False" DataKeyNames="CategoryID"
DataSourceID="SqlDataSource1" ShowFooter="true" AllowPaging="True" AllowSorting="True">
<Columns>
<asp:BoundField DataField="CategoryID" HeaderText="CategoryID"
SortExpression="CategoryID" />
<asp:BoundField DataField="CategoryName" HeaderText="CategoryName"
SortExpression="CategoryName" />
<asp:TemplateField>
<ItemTemplate>
<asp:TextBox ID="TextBox1" runat="server"></asp:TextBox>
<cc1:CalendarExtender ID="CalendarExtender1" runat="server" TargetControlID="TextBox1"/>
</ItemTemplate>
</asp:TemplateField>
</Columns>
</asp:GridView>
<asp:SqlDataSource ID="SqlDataSource1" runat="server" ConnectionString="Data Source=SUPROTIM;Initial Catalog=Northwind;Integrated Security=True"
SelectCommand="SELECT [CategoryID], [CategoryName] FROM [Categories]" >
</asp:SqlDataSource>
</div>
</form>
Tip 3: Enable Year Navigation in CalendarExtender
When the calendar appears, click on the title of the calendar to change the view to Months in the current year. Clicking it again, switches the view to Years, showing 10 years at a time.
If you plan to do this programmatically, here’s some code for you. Use the OnClientShown event and switch the mode using javascript. This tip was shared by one of the Microsoft® support person at the asp.net forums.
<asp:TextBox ID="TextBox1" runat="server"></asp:TextBox>
<cc1:CalendarExtender ID="CalendarExtender1"
runat="server" TargetControlID="TextBox1" OnClientShown="ChangeCalendarView" />
Then add this to the <head> section
<head runat="server">
<title>CalendarExtender</title>
<script type="text/javascript">
function ChangeCalendarView(sender,args)
{
sender._switchMode("years", true);
}
</script>
</head>
Tip 4: Display only the day and month in the CalendarExtender
To select only the day and month without the year, use the Format property of the CalendarExtender and set it to “dd/MM” as shown below:
<cc1:CalendarExtender ID="CalendarExtender1" runat="server" Format="dd/MM" TargetControlID="TextBox1" />
Tip 5: How to Set Culture to work with CalendarExtender
Make sure that the ScriptManager has EnableScriptGlobalization="true" and EnableScriptLocalization="true".
<asp:ScriptManager ID="ScriptManager1" runat="server"
EnableScriptGlobalization="true" EnableScriptLocalization="true" />
Tip 6: How to make sure user does not select a date earlier than today or greater than today
There could be instances where you do not want the user to select a day earlier than the current date. For example: when you are providing the user a form to book tickets, you would not like him to choose an earlier date. To achieve this requirement, use the following javascript code.
Prevent the User from selecting a Date Earlier than today
<head runat="server">
<title>Calendar Extender</title>
<script type="text/javascript">
function checkDate(sender,args)
{
if (sender._selectedDate < new Date())
{
alert("You cannot select a day earlier than today!");
sender._selectedDate = new Date();
// set the date back to the current date
sender._textbox.set_Value(sender._selectedDate.format(sender._format))
}
}
</script>
</head>
Call the code:
<form id="form1" runat="server">
<asp:ScriptManager ID="ScriptManager1" runat="server" />
<div>
<asp:TextBox ID="TextBox1" runat="server"></asp:TextBox>
<cc1:CalendarExtender ID="CalendarExtender1"
runat="server" OnClientDateSelectionChanged="checkDate" TargetControlID="TextBox1" />
</div>
</form>
Select Date Greater than today
In the javascript, just change this line
sender._selectedDate > new Date()
Note: You may argue that the user can still change the date by typing into the textbox or entering an invalid date. Well that can be easily handled using a ValidationControl and is covered in the next tip.
Tip 7: Add validation to the CalendarExtender Control
A simple way to add validation to the Calendar is to add an inbuilt .net Validation Control to the textbox associated with a CalendarExtender or use custom javascript validation.
We will be adding two ValidationControls to the textbox. The first, a CompareValidator to check if the user does not enter an invalid date (Eg: May 32) and second, a RangeValidator to keep the date range as desired.
Adding CompareValidator
<asp:CompareValidator ID="CompareValidator1" runat="server"
ControlToValidate="TextBox1" Display="Dynamic" ErrorMessage="Invalid Date"
Operator="DataTypeCheck" Type="Date">
</asp:CompareValidator>
<cc1:ValidatorCalloutExtender ID="CompareValidator1_ValidatorCalloutExtender"
runat="server" Enabled="True" TargetControlID="CompareValidator1">
</cc1:ValidatorCalloutExtender>
Adding RangeValidator - We will restrict the user to select a date range starting from today to 15 days from now.
<asp:RangeValidator ID="RangeValidator1" runat="server"
ControlToValidate="TextBox1" ErrorMessage="RangeValidator"
Type="Date">
</asp:RangeValidator>
<cc1:ValidatorCalloutExtender ID="RangeValidator1_ValidatorCalloutExtender"
runat="server" Enabled="True" TargetControlID="RangeValidator1">
</cc1:ValidatorCalloutExtender>
In the code behind of your page, add this code
C#
protected void Page_Load(object sender, EventArgs e)
{
RangeValidator1.MinimumValue = System.DateTime.Now.ToShortDateString();
RangeValidator1.MaximumValue = System.DateTime.Now.AddDays(15).ToShortDateString();
}
VB.NET
Protected Sub Page_Load(ByVal sender As Object, ByVal e As EventArgs)
RangeValidator1.MinimumValue = System.DateTime.Now.ToShortDateString()
RangeValidator1.MaximumValue = System.DateTime.Now.AddDays(15).ToShortDateString()
End Sub
In future versions of the toolkit, may be all this functionalities are inbuilt into the calendar control .
Disable future dates in ajaxToolkit:CalendarExtender
There could be instances where you do not want the user to select future dates. For example: when you are providing the user to enter his Birth date or date of passing of his/her highest qualification, you would not like him to choose an future date. To achieve this requirement, use the following javascript code.
Add below script
<script type="text/javascript">
function checkdate(txt)
{
var selectedDate = new Date(txt.value);
var today = new Date();
today.setHours(0,0,0,0);
if (selectedDate < today)
{
alert('Select today or a date bigger than that!');
txt.value = '';
}
}
</script>
<asp:TextBox runat="server" ID="Date5" onchange="checkdate(this);" />
<asp:ImageButton runat="Server" ID="Image1" ImageUrl="Calendar_scheduleHS.png" AlternateText="Click to show calendar" /><br />
<cc1:CalendarExtender ID="calendarButtonExtender" runat="server" TargetControlID="Date5" PopupButtonID="Image1" />
 here
here
Note: Images used on this website
are either a production of Bhaktivedanta Book Trust(https://www.krishna.com), Iskcon
Foundation or were found in google search under "Free to use and share". If any
of the images presented here violates copyright issues or infringes anyone copyright
or are not under "Fair use", then please bring it to our notice. Read
Disclaimer for more.
Share this to your friends. One of your friend is
waiting for your share.
Related Articles
create new controls in grid view at runtime
Hide or unhide data using Visibility ValueConverter class
Tips and tricks with ajax calendar extender control
Data Validation using Ajax MaskedEditExtender control
Validations using regular expressions and commonly used regex validations
Show animation effects using ajax UpdatePanelAnimation control
Change color of grid view row or cell dynamically
Advanced Datetime Format for string
Different Strings Format for Date Time
Post Comment